- Landline
- (630) 333-9292
- stoyan.ulbdry@aol.com
- @ulbdrychicago
- ulbdrywaterproofing
- Video
- www.youtube.com
- Website
- ulbdrywaterproofing.com
Description
ULB-DRY Waterproofing provides full-service commercial and residential basement waterproofing in the greater Chicagoland area, as well as many of the surrounding suburbs. Our team takes great pride in our work and the services we offer. We offer a complete line of the most up-to-date basement waterproofing and foundation crack repair techniques. Call today to learn how we can help.
Keywords waterproofing, basement, crack, repairs, drain, tile, installation, service, chicago, sump, pump, exterior, grading, spillover, tie, rod, pipe, window, well, cross drill injection, membrane applications, grout, crawl space, down spout, caulking, system, water, seepage, damage, flood, drainage, mold, mildew, oak brook, barrington, park ridge, naperville, elmhurst, lombard, arlington heights, burr ridge, lincolnwood, lisle, suburbs, spring, ulb dry, leakage, leak, foundation, storm, rain, home, house, residential, testing.
Reviews
Opening hours
Office appointments available on Saturdays
Payment Options
American Express , Visa , Cash , Check , Discover , MasterCard
Products And Services
-
Foundation Wall Leaks
Basement foundation walls come in a variety of different forms each with its own set of possible points of egress. Most basements are poured concrete with the most common problem being a wall crack or pipe penetrations. An epoxy/urethane injection can be used to solve these. However in the case of a CMU or cinder block foundation the cores of the block are hollow so any material injected would disperse throughout the voids long before it had a chance to cure and solidify. Brick and or stone foundations can only be completely sealed with an exterior membrane application.
Link: Foundation Wall Leaks
-
Tie Rod Leaks
The first step in pouring a foundation wall is to construct a form for the concrete. The tie rod refers to the small metal strap/rod that holds the inner and outer forms together. After the concrete has cured and the forms are pulled these are usually snapped off flush to the wall. Over a period of time these can rust out andallow water to migrate into the basement and this creates the problem.
Link: Tie Rod Leaks
-

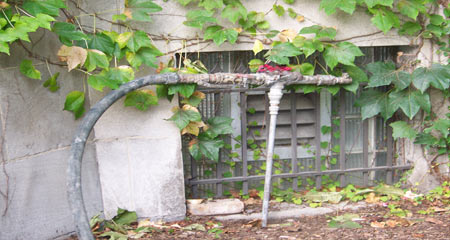
Window Well Water Leaks
Water seeping in through a window into the basement is a result of either a nonfunctioning well drain or no drain at all.
Link: Window Well Water Leaks
-
Grading Water Leaks
It is generally recognized that a percentage of rain water will naturally enter through the upper facade of the house. (around doors, windows or simply thru porous brick) So through the installation of through wall flashing and a series of weep holes this water is channeled away from the interior of building. This water exits through the horizontal joint between the foundation and the upper structure. When this joint is buried below the soil or is too close to finish grade the water cannot get out and thus is forced inwards. Furthermore any ground water directed towards the building will flow in through this joint. That is the waterproofing problem.
Link: Grading Water Leaks
-
Pipe Penetrations Leaks
Leaks can occur from wall piping installation. A larger core hole is drilled in the foundation and then the smaller line is feed through. There is a cement cap placed on both the interior and exterior faces of the foundation. Over time cement breaks down and the water flows in around the piping.
Link: Pipe Penetrations Leaks
-
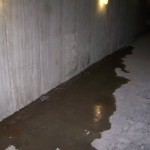
Cove Joint Seepage
This refers to water up from the joint between the floor slab and the foundation wall (commonly referred to as hydro-static pressure). The cove join is where the floor meets the wall. Heavy rains can raise the ground water and reach the basement floor and seep thru this joint. Injection at this site is not advisable since this would do nothing more than create a damming effect. The water pressure would continue to build up under the slab and force it way up elsewhere. In some cases even cracking of the foundation of the floor could occur.
-
Wall Crack Leaks
Most basements have wall cracks. Usually these are shrinkage cracks a result of the concrete freezing in a cold weather pour or drying out to fast in a warm weather. However, in some cases the soil around the house settles / contracts to a point that the foundation shifts and this can also cause wall cracking problems.
Link: Wall Crack Leaks
-
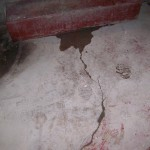
Floor Crack Leaks
A typical foundation is poured in three steps. First the footer is poured. This is the base of the foundation wall. Once the footer is solid, but not completely cured, the second step is pouring of the foundation wall directly on top of it. The third and last step the floor slab is poured. Since there is no direct connection between the slab and the foundation wall, the slab floats. This movement can create floor cracking. A properly functioning footer drain will help keep water from rising up out of the floor. Should water begin to rise out of the floor this is a sign of excessive hydro-staic pressure.
Link: Floor Crack Leaks
-
Sump Pumps
A properly working sump pump is the most important part of a footing drain tile system. After the tile channels all the water to the basin it is the function of the sump to pump the water either into the sewer system or out into the yard. Discharge will be determined by city code. We install a complete line of Zoeller Sumps. We offer both pro series 2400 as well as a complete line of the next generation NexPump.
Link: Sump Pumps


-

Basement Seepage Repair
Experience shows that over 60% of all homes with basements will experience seepage of one sort or another. On top of the obvious damage caused by basement seepage if left untreated it can lead to the growth of mold and bacteria resulting in musty odors and unhealthy air quality. Ulb-Dry Waterproofing’s staff of professionals has the expertise to perform a complete diagnosis of your basement seepage problems, then utilizing the best materials and techniques available will provide a free written estimate based on your particular circumstances.
Link: Basement Seepage Repair

-
Urethane/epoxy injection
The surface of the crack is cleaned and prepped. In the case of a virgin crack (that being one that has not been repaired before) the surface is cleaned of all loose dirt and other contaminates. A series of small plastic ports are set directly over the void and held in place with a two part epoxy mastic. In the case of a previously repaired crack the old patching material must be removed to expose the original void. In this case the port will be held in place with a non-shrink waterproof mortar. While waiting for the surface patch to dry the exterior area is check and any portion of the crack above grade is sealed to help insure the resin is confined to the wall cavity. Once the surface patch has cured an epoxy/urethane resin in injected into the wall crack starting at the port closet to the floor level. Injection will continue into this port until the material is forced upward and flows out of the port above. The injection port is caped and the towards the top of the foundation until the resin is noted over the top of the foundation.
Link: Urethane/epoxy injection
-
Cross Drill Urethane Grout Injection
The existing patching material is removed to expose the problem area. A series of 3/8th inch holes are drilled approx. 4″ to 6″ of the crack. Then the holes are angled inwards in an attempt to intersect the void at the half way point. A small brass packer complete with a zirk is secured into each hole. The void is flushed with clean cool water. Using a small hand operated barrel pump inject a one part urethane into the void. Injection continues until either the material is seen oozing out of the void or the back pressure is too great to continue. Once any material which may have oozed out of the void has had a chance to cure it will be scrapped off and removed.
-
Exterior Crack Repair
In order to address the crack from the exterior, a hole is excavated down to the footer and the wall is cleaned of all loose dirt and other contaminates. A “Bento-Seal” paste is applied over the crack form the top of footer up to within 6″ of finish grade. (“Bento seal” is a combination of sodium bento nite and butyl rubber in a paste form.) The upper portion of the void as well as any of that above grade is coated with a one part urethane. The reason for this is that the seasonal changes in temperature as well as the sun’s ultra-violet rays will have an adverse effect on the bento seal. It has also been shown to have the same negative effects on most all asphalt based sealants. A layer of heavy duty visqeen is embedded into the seal. A small amount of “Bento-nite” powder is dumped into the base of the hole. A 3 sided form is created using a “Bento-board” and then this form backfilled around using the existing soil. “Bento-nite” boarding is a water soluble card board with “Bento-nite” power filling in the corrugations. An addition measure of “Bento-nite” powder is fill inside the form up to within 6″ of finish grade. The remaining portion of the excavation is capped off with the existing soil leaving a small mound to allow for settling. All excess spoil is removed and disposed of properly. In the situations where concrete or asphalt was removed it will be replaced after the area as been allowed enough time to settle properly.
Link: Exterior Crack Repair
-
Interior Drain Tile Installations
With the assistance of the homeowner the area is prepped and plastic is hung. The concrete slab is removed approx. 12 to 18″ off the foundation wall. A trench is excavated no less than 10″ below the floor slab. This trench will slope approx. 1/8″ per running foot until it reaches the sump basin. If needed a new basin can be installed. An opening approx. 36″ round and deep is created in the floor. A small bed of gravel will be placed in the bottom of the hole. A 32″ deep poly basin is placed into the hole and surrounded with stone. A small base of 3/4″ stone is placed in the bottom of the trench. A 4″ perforated drainage tile complete with a filter sock is laid in the trench. The tile is covered to within 3″ of the floor slab with an additional layer of 3/4″ stone. A dimpled drainage mat is placed over the gravel and up the foundation wall approximately 4″. The cement is replaced level to the existing.
-
Exterior Drain Tile Installations
J.U.L.I.E will be called to mark the area. A series of plywood planking will be placed across the ground/soil. A trench will be excavated by hand from top of grade down to and in front of the footer. From this point the trench next to the footer will be sloped towards the existing sump. A small layer of 3/4″ stone will be placed in the base of the trench. A 4″ perforated PBVC tile with filter sock will be placed into the trench and connected to the basin. Another layer of 3/4″ stone is placed over the tile up to the height of the top of footer. A dimpled drainage mat with a filter fabric will be secured to the foundation wall from a point just above finish grade down to and across the stone. An additional 12″ of stone will be added. The remaining trench is backfilled and compacted using the existing soil leaving a small mound to allow for excess settling. All excess spoil will be removed and disposed of properly.
-
Exterior Membrane Applications
Foundation wall are excavated and inspected. All major voids and cracks are filled with a waterproof mortar. A primer is applied to help with adhesion. A cant of sealant is applied to the juncture of the foundation and the footer. The membrane is applied to the wall and all lap joints are properly sealed. A termination bar is added across the upper edge and sealed in place. (partial wall will have termination bar at the vertical edges as well.) A black drainage mat with filter fabric will be installed to the wall to help channel ground water down to the footer. The trench is backfilled and compacted leaving a small mound for excess settling. All excess spoils will be removed and disposed of properly.
-
Bento-Nite Grout Injection – Through wall/Under Slab
A series of 1″ holes are cored through the wall/slab in a 2′ to 3′ grid pattern. A metal packer complete with a gate valve is secured into the core. Using a large tow behind machine a slurry of “Bento-grout” is injected through the wall creating a seal on the exterior. Injection will continue into each packer until either the material is noted at an adjacent packer or the back pressure is too great to continue. Once all the injection is complete the holes are caped with a light grey waterproof mortar Any materials which may have oozed out onto the floor slab or above grade will be scrapped up and removed.
-
Exterior Application
A series of spud holes are created next to the foundation. An injection rod in placed into the spud hole. Using a large tow behind machine a slurry of “Bento-grout” is injected down next to the foundation. In order to insure the best possible coverage the injection rod is slowy raised out of the ground during the injection process. Any material which may have oozed out of the ground will be scrapped up and removed.
Link: Exterior Application
-

Fortress Stabilization
Soil pressure can fracture a block or concrete foundation wall causing horizontal and vertical cracks and/or bowing. The foundation must be stabilized to assure that you will retain the full value of your home. Fortress Stabilization Systems has developed a carbon fiber/kevlar grid that will halt and further movement of a block or concrete wall. It will do it easily, safely and without any outside excavation. The grid lies flat against the wall and when painted over are hardly noticable. Your wall will NEVER bow or crack again.
Link: Fortress Stabilization
-
Turbo Seal
An innovative concept in waterproofing technology, Turbo-Seal is a flexible gel that bonds to any surface to create an impervious waterproofing membrane. Turbo-Seal can be applied as a membrane for new construction waterproofing or injection repair material in any environment.
Link: Turbo Seal


-
Crawl Space Encapsulation/Sealing
To help reclaim that dirty musty crawl space we offer a complete ecapsulation of the existing soil crawl. 1. The crawl must be cleaned of all trash and other items. 2. All vents to the exterior must be permanently sealed. 3. Any wall cracks will be treated accordingly. 4. A perimeter drain tile with sealed sump basin will be installed to control any water seepage. 5. In cases where excessive soil gases are present a passive venting system will be installed in conjunction with the tile system and discharged to the exterior. 6. The area between the rim joist will be insulated with a spray in foam. 7. A felt underlayment is rolled out over the entire ground surface. This will help create air movement under the liner. 8. A heavy duty white faced/ reflective double bubble insulation is applied to the floor slab, the foundation wall and the underside of the floor joist. 9. In order to help condition the air a dehumidifier is installed. That once ugly crawl is now a safe functional part of your home.
-
Down Spout Extensions
These can be done either above grade or underground based on the termination points available. One of the most overlooked ways to help prevent excessive water build up around your foundation is to insure that the rain water of the roof as well as the discharge from the storm water sump is moved far enough away that is does not flow directly back to the foundation. At Ulb-Dry Waterproofing we offer both above ground as well as sub soil solutions. Above grade: The existing downspout line from the roof will be cut to allow a proper angle for the water to run away. A new section of pipe will be connected to the existing line and secured in place. However even though this is quick and inexpensive it can often result in unsightly lines above grade so we also offer an alternative. Subsoil Technique. After the termination point has been determined we will: Cut out and remove the sod, placing it to the side to be reset upon completion. Excavate a trench by hand. This trench will be a minimum of 6″ inches deep and slope a minimum of 1/8″ per foot towards the termination. Idealistically you would want a discharge, (this is when the water flows directly out of the line without an upturn) However in the situation where grade does not allow for this we will utilize either a bubbler pot or a larger basin to be determined by water volume. A small bed of stone is laid in the base of the trench. If a bubbler or basin is required it will surrounded with stone A 4″ SDS 27-29 PVC line is installed with a direct connection to the downspout line. In order to help the water drain out the last section of the line is perforated rather than solid. The solid portion of the line is covered with soil will the perforated section is surrounded with stone. The sod is replaced. All remaining spoil will. The area will be raked level with all remaining spoil will removed and disposed of properly
Link: Down Spout Extensions
-
Glass Block Window Installations
We offer a complete of glass block windows with and without vents crafted to you specific needs.
-
Window Well Replacements
In the case where a well cannot be re-sealed to a wall because it has become deformed or is rusted out we offer both “Monarch” and “Bowmen-Kemp” replacement wells.
Link: Window Well Replacements


Categories
B2B Waterproofing(630)333-9292 (630)-333-9292 +16303339292
Map 705 N Princeton Ave
Loading map...